How to Identify and Fix Engine Oil Leak from Head Gasket Quickly and Effectively
Engine oil leaks from the head gasket can be a serious issue that affects engine performance and longevity. Even small leaks may lead to low oil levels, reduced lubrication, overheating, and potential engine damage over time. Understanding the signs and taking timely action is essential to prevent costly repairs and maintain reliable engine operation.
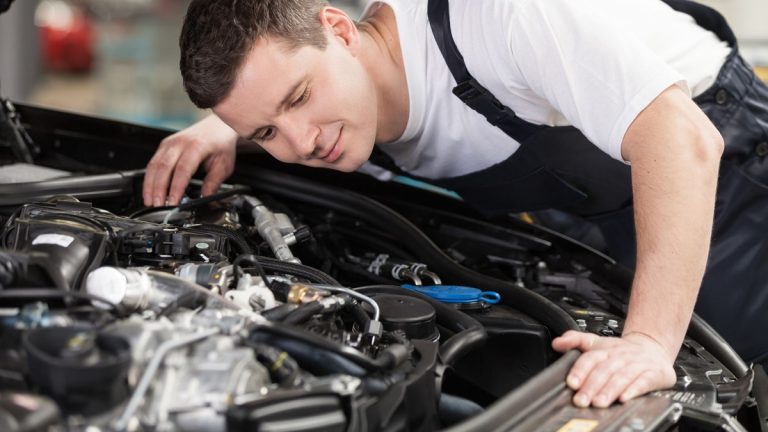
Identifying the source of an oil leak requires careful observation. Leaks from the head gasket often manifest as oil seeping around the cylinder head, mixing with coolant, or leaving residue on the engine block. These symptoms can be subtle at first, but over time, they become more noticeable, especially under heavy use or extended idling.
Knowing How to Identify and Fix Engine Oil Leak from Head Gasket empowers vehicle owners and mechanics to address the issue effectively. Recognizing the problem early allows for proper repairs, preventing further engine wear and maintaining safe operation.
A systematic approach, including visual inspection, monitoring oil levels, and checking for contamination in the coolant, ensures accurate diagnosis. Following the correct steps restores engine integrity and avoids complications associated with prolonged oil leakage.
Taking prompt action not only preserves engine performance but also saves time and money by preventing more extensive damage. Understanding the methods to How to Identify and Fix Engine Oil Leak from Head Gasket ensures your engine continues to run efficiently and safely.
Recognizing the Signs of a Head Gasket Oil Leak
A head gasket oil leak can be a subtle issue at first, but early detection is crucial to prevent severe engine damage. The head gasket seals the combustion chambers and oil passages between the engine block and cylinder head, so any breach can allow oil to escape. Recognizing the signs of a head gasket oil leak helps you diagnose the problem before it escalates, saving time and costly repairs.
Visible Oil Leaks Around the Cylinder Head
One of the most obvious signs of a head gasket oil leak is visible oil around the cylinder head or engine block. Oil may seep from the gasket joint where the cylinder head meets the engine block. Over time, this can form dark, greasy residue along the edges or drip onto surrounding components.
Checking for oil puddles under the vehicle is a straightforward way to detect leaks. Look closely at the top and sides of the engine for wet spots, discoloration, or crusted oil buildup. A leak at this location is often slow at first but can worsen with heat and engine pressure, making early observation critical. Detecting visible oil early allows you to monitor the leak and prepare for necessary repairs, reducing the risk of further internal damage.
Oil Contamination in the Coolant
A head gasket leak may also cause engine oil to mix with coolant. This occurs when the gasket fails to properly separate oil and coolant passages. Contaminated coolant may appear milky, frothy, or discolored, sometimes resembling coffee with cream.
This type of contamination can reduce the coolant’s ability to regulate engine temperature, leading to overheating and increased wear on engine components. Regularly checking the coolant reservoir for unusual coloration or consistency can help identify this issue early. Flushing the contaminated coolant and repairing the gasket restores proper separation of fluids, prevents overheating, and protects the engine’s internal components from long-term damage. Recognizing this sign ensures that the engine operates safely and maintains proper lubrication and cooling.
White Smoke from the Exhaust
White smoke emitting from the exhaust can indicate a head gasket oil leak in combination with other issues. When oil seeps into the combustion chamber, it burns along with fuel, producing thick white or bluish smoke. The smoke is often more noticeable during acceleration or when the engine is under load.
Consistent white smoke is not only a sign of burning oil but also an indicator of possible gasket failure. Ignoring this symptom can result in reduced engine performance, fouled spark plugs, and damage to catalytic converters. Observing exhaust smoke behavior during different driving conditions helps determine whether oil is entering the combustion chamber. Early detection allows for timely repair and prevents more severe internal engine damage.
Decreased Engine Performance and Overheating
A compromised head gasket can also lead to decreased engine performance and overheating. Oil leaks reduce lubrication, increasing friction between moving parts and contributing to vibrations or engine shaking. Reduced oil levels may trigger warning lights or abnormal engine sounds.
Overheating can occur because oil contamination in the coolant reduces its efficiency in regulating temperature. Drivers may notice a gradual loss of power, rough idling, or a tendency for the engine to run hotter than usual. Monitoring oil levels, temperature gauges, and engine behavior provides crucial clues to a head gasket problem. Identifying these symptoms early helps prevent catastrophic failure and ensures the engine continues to operate reliably.
Unusual Engine Noises
A head gasket oil leak can also contribute to unusual engine noises. Low oil levels or reduced lubrication may cause knocking, ticking, or rattling sounds from the engine block. These noises often become more pronounced under load, during acceleration, or at higher RPMs.
Listening carefully for these sounds and correlating them with oil levels or visible leaks can help confirm a head gasket issue. Addressing unusual noises promptly through inspection and repair maintains engine integrity, reduces wear on moving parts, and restores smooth performance. Recognizing these auditory signs alongside visual and functional symptoms provides a comprehensive approach to identifying a head gasket oil leak.
Tools and Materials Needed for Inspection
Performing a thorough inspection for a head gasket oil leak requires the right tools and materials. Using proper equipment ensures accurate detection of leaks, helps assess the condition of the engine, and makes the repair process safer and more efficient. Having everything prepared before starting the inspection saves time and prevents mistakes that could cause further damage.
Basic Hand Tools
Basic hand tools are essential for accessing and inspecting engine components. Wrenches, ratchets, and socket sets allow you to remove engine covers, intake manifolds, and other parts that may obstruct your view of the head gasket. Screwdrivers of various sizes are necessary for loosening clamps or removing small covers, while pliers help with hose clamps and electrical connections.
Using the correct tool sizes prevents stripping bolts or damaging sensitive components. Torque wrenches are particularly important for reassembling parts after inspection, ensuring bolts are tightened to manufacturer specifications. Proper hand tools make the inspection process smoother and reduce the risk of accidental damage to the engine or surrounding components.
Cleaning Materials
Cleaning materials are critical for detecting leaks and inspecting surfaces. Degreasing sprays, brake cleaner, or engine cleaner help remove oil, dirt, and grime that may hide the source of a leak. Clean rags, microfiber cloths, and brushes allow you to wipe down surfaces and detect fresh oil seepage more easily.
By thoroughly cleaning the engine area around the head gasket, you can monitor for new leaks over time. A clean surface also ensures accurate visual inspection and reduces the chance of misdiagnosing old residue as an active leak. Keeping cleaning supplies on hand improves accuracy and helps maintain a safe, organized workspace.
Inspection Aids
Inspection aids enhance your ability to detect subtle signs of a head gasket leak. A flashlight or work light illuminates hard-to-see areas around the cylinder head, while a mirror allows you to inspect tight spots or the underside of components. A borescope or inspection camera can provide a close-up view of difficult-to-reach areas without disassembly.
These tools make it easier to identify small oil seepage, cracks, or gasket deterioration. Using inspection aids ensures a thorough examination and helps pinpoint the exact source of the leak, making subsequent repairs more precise and efficient. Proper lighting and visual tools improve both accuracy and safety during the inspection process.
Diagnostic Tools
Diagnostic tools can help confirm a head gasket oil leak and assess engine performance. Compression testers measure cylinder pressure to detect leaks or low compression, which may indicate gasket failure. Leak-down testers provide additional confirmation by pressurizing cylinders to locate escaping air. Coolant testers can detect oil contamination, while multimeters help evaluate electrical components related to engine operation.
Using diagnostic tools alongside visual inspection ensures a comprehensive evaluation. Accurate testing identifies the severity and location of the leak, guiding necessary repairs and preventing further engine damage. Having these tools available ensures a methodical and reliable approach to head gasket inspection.
Safety Equipment and Supplies
Safety equipment is essential when inspecting an engine. Gloves protect your hands from oil, chemicals, and sharp edges, while safety glasses shield your eyes from debris and splashes. A fire extinguisher should be nearby when working around flammable fluids, and a drip tray helps contain leaking oil during inspection.
Maintaining a clean and safe workspace reduces the risk of accidents and keeps the engine area organized. Proper safety precautions ensure you can inspect the engine effectively while protecting yourself and the surrounding environment. Using personal protective equipment is a fundamental part of any inspection process.
Step-by-Step Inspection to Identify the Leak
Identifying an engine oil leak from the head gasket requires a careful, systematic approach. Skipping steps or relying solely on guesswork can result in misdiagnosis and further engine damage. A structured inspection involves visual checks, fluid analysis, and testing of engine components to pinpoint the exact source of the leak. Following a detailed, step-by-step process ensures accurate detection and prepares you for effective repair.
Step 1: Preparing the Engine for Inspection
Begin by preparing the engine to ensure safety and accessibility. Park the vehicle on a flat surface and allow the engine to cool completely, as working on a hot engine increases the risk of burns. Disconnect the battery to prevent accidental shorts or electrical shocks while inspecting components.
Remove any parts obstructing access to the cylinder head, including engine covers, air intake hoses, and intake manifolds. Clean the surrounding area using a degreaser or engine cleaner to remove accumulated oil, dirt, and grime. A clean surface makes it easier to spot new leaks and prevents misidentification of old oil residue as a current leak.
Having all necessary tools and safety equipment ready, including gloves, safety glasses, flashlights, and mirrors, ensures a smooth inspection process. Proper preparation minimizes errors, increases visibility, and sets a strong foundation for accurately identifying the head gasket leak.
Step 2: Visual Inspection of the Cylinder Head
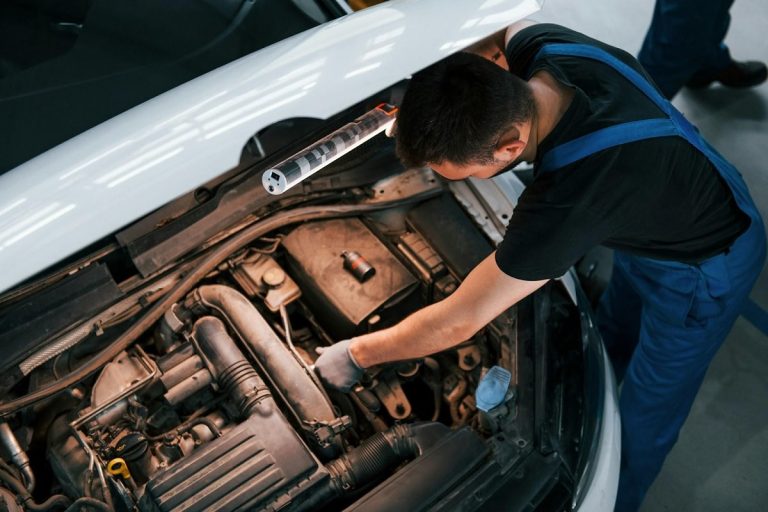
The next step is a detailed visual inspection of the cylinder head and surrounding areas. Examine the joint between the cylinder head and engine block for signs of oil seepage, wet spots, or crusted deposits. Look for discoloration, streaks, or fresh oil forming around the head gasket area.
Pay attention to hard-to-reach areas using a flashlight or inspection mirror. Small cracks or pinholes in the gasket may allow oil to escape slowly, causing subtle leaks that can worsen over time. Check the top and sides of the engine, as oil may travel along surfaces before dripping to the ground.
Consistent observation of these areas over a short period can help confirm active leaks. Mark any suspicious spots and compare them after running the engine for a few minutes to see if oil appears or spreads. Visual inspection is often the first and most revealing step in diagnosing a head gasket oil leak.
Step 3: Checking Oil and Coolant Levels
Inspecting the engine’s oil and coolant levels provides crucial information about potential gasket failure. A head gasket leak often causes oil to mix with coolant, producing a milky or frothy appearance in the radiator or reservoir. Simultaneously, low oil levels may indicate that the engine is losing oil internally.
Remove the oil cap and dipstick to examine the oil for contamination. Dark, thick oil may indicate normal use, but a lighter or creamy consistency can signal coolant mixing. Inspect the coolant reservoir for signs of oil contamination or unusual coloration, which confirms that the leak is likely coming from the head gasket.
Monitoring oil and coolant levels during engine operation helps assess the severity of the leak. Sudden drops in either fluid or visible contamination suggest an active head gasket problem that requires immediate attention. These checks complement the visual inspection, providing a clearer picture of the leak.
Step 4: Performing a Compression or Leak-Down Test
Compression and leak-down tests are effective diagnostic tools for identifying head gasket leaks. A compression test measures cylinder pressure, revealing whether one or more cylinders are losing pressure due to gasket failure or other mechanical issues. Cylinders with significantly lower pressure compared to others indicate possible gasket leaks.
A leak-down test pressurizes individual cylinders to determine where air escapes. Common escape points include the intake or exhaust manifold, the crankcase, or the coolant system, which confirms a head gasket breach. These tests require specialized tools, but they provide precise information about the location and severity of the leak.
Recording and comparing readings across all cylinders helps identify inconsistencies caused by gasket damage. This step is critical because visual inspection alone may not reveal internal leaks, and performing these tests ensures that the exact source of the oil leak is accurately diagnosed.
Step 5: Inspecting for Exhaust Smoke or Engine Behavior
Observing exhaust smoke and engine behavior provides additional evidence of a head gasket oil leak. Blue or white smoke from the exhaust indicates that oil is entering the combustion chamber, burning along with fuel. This is especially noticeable during acceleration or when the engine is under load.
Monitor engine performance for unusual vibrations, knocking, or power loss, as these can be secondary effects of a failing head gasket. Engine overheating, rough idling, or poor throttle response may accompany the leak. Keeping detailed notes on when these symptoms occur helps correlate them with visual and mechanical inspection findings.
Using a combination of visual cues, smoke observation, and engine performance analysis ensures a comprehensive evaluation. Confirming the presence of smoke along with leaks and fluid contamination provides strong evidence of a head gasket oil leak.
Step 6: Using UV Dye or Specialized Leak Detection Tools
For leaks that are not immediately visible, using UV dye and a blacklight can help pinpoint the exact source. Add a small amount of UV-reactive oil dye to the engine oil, run the engine for a short period, and inspect the head gasket area under a blacklight. The dye highlights even minor leaks that may not be noticeable to the naked eye.
Specialized leak detection tools, such as borescopes or endoscopes, can provide close-up views of tight or hidden areas. These tools are particularly useful for inspecting under intake manifolds or around cylinder head bolts, ensuring no leakage points are missed.
Using these advanced tools complements visual inspection and diagnostic tests, providing a clear, definitive identification of the oil leak. Accurate identification at this stage allows for targeted repair, preventing further engine damage and restoring reliable performance.
Step 7: Documenting Findings for Repair
Once the leak is identified, document all observations, including visual evidence, compression or leak-down test results, fluid analysis, and any smoke or vibration symptoms. Photographs and notes provide a reference for repair planning and can help mechanics understand the extent of the problem.
Recording these findings ensures that repairs are precise and avoids unnecessary part replacements. Proper documentation also helps monitor the effectiveness of repairs over time, ensuring the head gasket oil leak is fully addressed and the engine continues to operate safely and efficiently.
Fixing the Engine Oil Leak from Head Gasket
Repairing an engine oil leak from a head gasket is a critical step to restore engine performance and prevent long-term damage. Addressing the leak promptly avoids overheating, reduced lubrication, and potential failure of internal components. Fixing the leak requires a combination of preparation, proper tools, careful disassembly, and attention to detail to ensure the gasket seals correctly and the engine operates reliably.
Preparing the Vehicle and Engine
Before starting repairs, ensure the vehicle is parked on a flat, stable surface and the engine is completely cool. Disconnect the battery to prevent accidental electrical shorts while working. Drain the engine oil and coolant into appropriate containers for proper disposal, as removing contaminated fluids prevents further mess and allows clean replacement after the repair.
Remove components that obstruct access to the cylinder head, such as the air intake, exhaust manifold, valve covers, and timing components if necessary. Cleaning the surrounding area with degreaser or engine cleaner ensures you can clearly inspect surfaces and prevents dirt or debris from contaminating the engine during reassembly. Proper preparation minimizes the risk of errors and lays the groundwork for a smooth repair process.
Removing the Cylinder Head
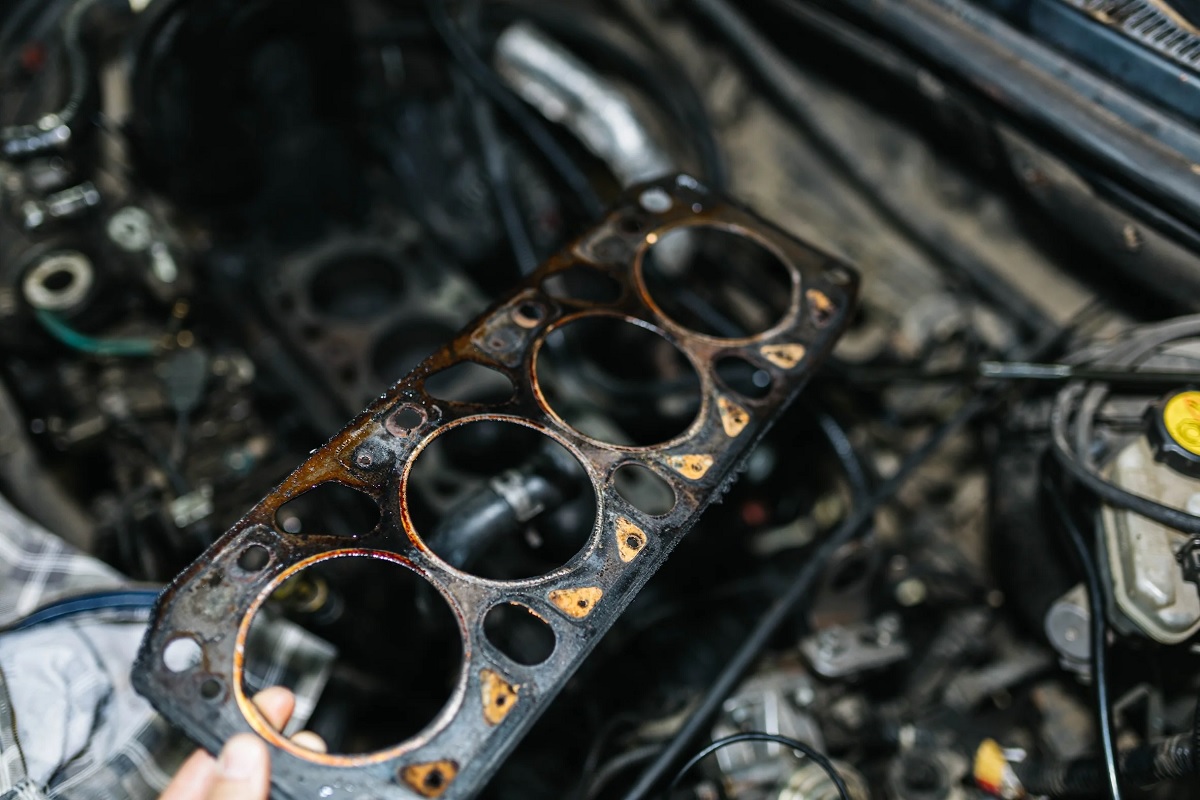
To replace the head gasket, carefully remove the cylinder head following manufacturer specifications. This process often involves loosening bolts in a specific sequence to avoid warping or damaging the head. Keep track of all bolts, nuts, and components, labeling or organizing them for reassembly.
Once removed, inspect the cylinder head and engine block for warping, cracks, or other damage. Any imperfections must be corrected before installing a new gasket, as a warped or damaged surface will prevent proper sealing and cause recurring leaks. Machining or professional resurfacing may be required in some cases. Ensuring the head and block are in excellent condition is critical for a durable repair and reliable engine performance.
Installing the New Head Gasket
Select a high-quality replacement head gasket that matches your engine specifications. Position the gasket carefully on the engine block, ensuring all holes align correctly with oil passages, coolant channels, and bolt locations. Incorrect placement can lead to immediate leaks or long-term engine damage.
Place the cylinder head back onto the gasket, making sure it sits flush and evenly across the surface. Follow the manufacturer’s recommended torque sequence and specifications when tightening head bolts. Proper torque and sequence prevent warping, uneven pressure, and gasket failure. Reassembling components in the correct order, including timing parts, valve covers, and intake or exhaust manifolds, is essential to restore engine function and prevent additional leaks.
Refilling Fluids and Testing
After reassembly, refill the engine with fresh oil and coolant. Check for leaks at all connections and around the cylinder head. Start the engine and allow it to reach normal operating temperature, observing for unusual noises, vibrations, or smoke. Monitoring oil pressure and coolant temperature ensures the engine is functioning correctly.
Take the vehicle for a short test drive under light load, then recheck fluid levels and inspect for leaks. This step verifies that the head gasket is properly sealed and that the repair was successful. Timely identification and correction of minor issues during testing prevents major failures and ensures long-term engine reliability.
Preventive Measures Post-Repair
To maintain the integrity of the head gasket after repair, follow regular maintenance practices. Monitor oil and coolant levels, avoid excessive engine overheating, and use high-quality fluids. Avoid aggressive driving immediately after repair to allow the gasket to properly settle and seal.
Routine inspections of the engine, including visual checks around the cylinder head and monitoring performance, help detect potential issues early. Following these preventive measures ensures the engine oil leak remains resolved, the engine operates smoothly, and long-term damage is minimized. Regular attention after repair maximizes the lifespan of the head gasket and engine.
Preventive Measures After Repair
After repairing an engine oil leak from the head gasket, taking preventive measures is crucial to maintain the repair, ensure engine longevity, and avoid future leaks. Even a perfectly installed gasket can fail prematurely without proper care. Implementing routine inspections, fluid maintenance, and careful driving habits helps preserve engine performance and reduces the risk of recurring head gasket issues.
Regular Fluid Checks and Quality
Maintaining proper oil and coolant levels is the first preventive measure after a head gasket repair. Low oil or coolant levels can strain the engine, causing overheating and uneven lubrication, which may compromise the new gasket. Check fluid levels frequently, especially during the first few hundred miles after the repair, to detect any minor leaks early.
Using high-quality engine oil and coolant is equally important. Recommended fluids ensure proper viscosity, temperature control, and chemical stability, preventing corrosion or residue buildup that could damage the gasket or engine components. Regularly changing fluids according to the manufacturer’s schedule also helps maintain optimal lubrication, cooling, and engine efficiency, reducing the chances of future leaks and ensuring smooth operation.
Controlled Engine Operation
After a head gasket repair, the engine requires careful operation to allow proper settling of the gasket. Avoid aggressive acceleration, high RPMs, or heavy loads during the initial period following the repair. Sudden thermal stress or excessive pressure can compromise the seal and lead to leaks.
Gradually bringing the engine up to operating temperature ensures uniform expansion of the cylinder head and block, allowing the gasket to seat properly. Monitor engine performance closely during this period, including oil pressure, temperature, and any unusual noises or vibrations. Controlled engine operation protects the repair, minimizes stress on the gasket, and ensures a long-lasting seal.
Routine Visual Inspections
Regular visual inspections are essential for detecting potential issues early. Check the area around the cylinder head, valve covers, and engine block for signs of oil seepage, discoloration, or crusted residue. Monitoring the condition of hoses, clamps, and seals helps identify small leaks before they become major problems.
Inspecting the coolant for contamination or unusual coloration is also important, as it can indicate minor head gasket issues. Keeping a close eye on these signs ensures that any problems are addressed promptly, preventing recurrence and maintaining the engine’s reliability and performance.
Maintaining Proper Cooling System Function
A well-functioning cooling system is vital to prevent overheating, which is a major cause of head gasket failure. Ensure the radiator, hoses, and water pump are in good condition, and regularly flush and refill the coolant according to the manufacturer’s guidelines.
Avoid engine overheating by monitoring temperature gauges and addressing issues such as clogged radiators, faulty thermostats, or low coolant promptly. Proper cooling preserves gasket integrity, protects the engine block and cylinder head, and prevents stress that could lead to future leaks or engine damage.
Long-Term Engine Care
Consistent preventive maintenance extends the life of both the head gasket and the engine. Follow scheduled oil changes, replace worn components, and avoid prolonged engine stress, such as excessive idling or towing beyond capacity.
Maintaining clean and well-lubricated components, along with careful driving and fluid monitoring, ensures that the repaired gasket remains effective. Long-term attention to engine care protects performance, prevents recurrence of leaks, and maximizes reliability, allowing the engine to operate efficiently for years after the repair.
Testing and Verifying the Repair
After fixing an engine oil leak from the head gasket, testing and verifying the repair is critical to ensure the engine operates properly and the leak has been fully resolved. Skipping this step can lead to undetected issues, recurring leaks, or engine damage. A thorough verification process combines visual inspection, fluid monitoring, engine performance checks, and diagnostic testing to confirm the repair’s success.
Initial Visual Inspection
Begin by performing a careful visual inspection immediately after reassembling the engine and refilling fluids. Check around the cylinder head, valve covers, and gasket edges for any signs of fresh oil seepage. Inspect nearby components, hoses, and connections to ensure there are no residual leaks from disturbed parts.
Run the engine at idle and observe the repaired area closely. Look for any oil accumulation or unusual residue forming, as even small leaks can indicate improper gasket seating or bolt torque issues. This initial inspection sets the baseline for further testing and helps confirm that the repair was performed correctly before subjecting the engine to higher loads.
Monitoring Oil and Coolant Levels
Proper verification requires monitoring both oil and coolant levels over a period of operation. Check the engine oil and coolant regularly during the first few days of use. Stable fluid levels with no signs of contamination indicate that the head gasket is sealing properly.
Also, inspect the oil for any unusual discoloration or milky appearance, which would suggest coolant entering the oil system. Similarly, check the coolant for oil contamination, ensuring it remains clear and free from milky or frothy residue. Consistent levels and clean fluids demonstrate that the repair successfully restored proper separation between oil and coolant passages.
Test Drive Under Controlled Conditions
Conduct a controlled test drive to evaluate engine performance under load. Start with gentle acceleration and light loads, gradually increasing speed while monitoring for unusual noises, vibrations, smoke, or overheating. Observing the engine during typical operating conditions helps detect issues that might not be apparent at idle.
Pay attention to throttle response, RPM stability, and any signs of hesitation or loss of power. Smooth performance without abnormal sounds or smoke confirms that the head gasket repair is functioning correctly. Test driving in varied conditions ensures that the repair is durable and the engine can handle real-world demands.
Diagnostic Checks
Using diagnostic tools adds an additional layer of verification. Perform a compression test or leak-down test on all cylinders to ensure proper sealing and pressure retention. Check engine sensors and ignition timing to confirm the engine is operating within normal parameters.
These tests provide objective data to verify that the repair was successful and there are no hidden issues affecting engine performance. Combining diagnostic results with visual inspections and test drives ensures a comprehensive evaluation of the repair.
Long-Term Monitoring
Even after initial verification, ongoing monitoring is essential. Continue to check oil and coolant levels, inspect for leaks, and observe engine behavior during the first few hundred miles of operation. Periodic checks provide early warning of potential problems and help maintain engine reliability.
By combining immediate inspections, fluid monitoring, test drives, diagnostic testing, and long-term observation, you can confidently verify that the head gasket oil leak repair is complete and the engine is operating efficiently and safely.
Frequently Asked Questions
What Are The First Signs That Indicate You Need To Identify And Fix Engine?
Early signs that you need to identify and fix your engine include unusual noises, loss of power, excessive vibrations, or rough idling. You may notice warning lights on the dashboard, smoke from the exhaust, or a drop in fluid levels. These symptoms indicate potential internal issues that, if ignored, can lead to severe engine damage.
Regularly monitoring engine behavior and performing visual inspections helps you catch problems early. By identifying the source quickly, you can take corrective actions, prevent further damage, and maintain smooth, reliable engine performance.
How Do You Start The Process To Identify Engine Problems?
Starting the process to identify engine problems requires careful observation and systematic inspection. Begin by checking for visible leaks, fluid contamination, unusual noises, and engine vibrations. Monitoring oil, coolant, and other fluid levels can reveal early signs of failure.
Next, inspect critical systems including the fuel, ignition, air intake, exhaust, and electrical components. Using diagnostic tools such as compression testers or scan tools provides additional insight into engine health. A methodical approach ensures you accurately pinpoint issues and prepares you for effective repairs.
What Tools Are Essential For Identifying Engine Issues?
Identifying engine issues requires basic and specialized tools. Essential items include wrenches, screwdrivers, pliers, torque wrenches, and ratchets for component removal. Flashlights, mirrors, and inspection cameras help access tight spots.
Diagnostic tools such as compression testers, leak-down testers, multimeters, and scan tools provide precise readings on engine performance, electrical systems, and fluid conditions. Cleaning supplies like degreasers and rags help spot leaks more easily. Using the correct tools ensures accurate identification and reduces the risk of further engine damage.
How Can You Determine If A Head Gasket Is Causing Engine Problems?
A failing head gasket often causes engine overheating, loss of power, or white/blue smoke from the exhaust. Oil contamination in the coolant or coolant contamination in the oil is another key indicator. Poor compression in one or more cylinders can also point to gasket failure.
Perform visual inspections around the cylinder head and monitor fluid conditions. Compression and leak-down tests help confirm the issue. Recognizing these signs allows you to determine if the head gasket is the source of engine problems and take timely action for repair.
What Steps Are Involved In Fixing Engine Problems?
Fixing engine problems involves preparation, diagnosis, repair, and verification. Start by preparing the vehicle, cleaning components, and removing obstructions. Identify the issue through visual inspection, fluid checks, and diagnostic testing.
Repair steps vary depending on the problem, from replacing worn spark plugs or faulty sensors to fixing a leaking head gasket or repairing damaged components. Follow manufacturer specifications for torque and assembly. After repairs, refill fluids, test the engine, and verify that the issue has been resolved to ensure long-term reliability.
How Do You Test And Verify That The Repair Was Successful?
Testing and verifying repairs requires a combination of visual inspection, performance monitoring, and diagnostic testing. Start by checking the repaired area for leaks or loose components. Monitor oil, coolant, and other fluid levels for stability.
Perform a test drive under controlled conditions, observing engine behavior for unusual noises, vibrations, or power loss. Using compression tests, leak-down tests, or scan tools confirms proper operation. This ensures the repair is effective, the engine is functioning reliably, and there are no hidden issues.
What Preventive Measures Can Help Avoid Future Engine Problems?
Preventive measures include regular maintenance, timely fluid changes, and routine inspections. Check oil, coolant, and other fluids consistently, and replace worn components such as spark plugs, belts, or hoses. Monitor engine temperature and listen for unusual noises.
Avoid aggressive driving immediately after repairs, maintain proper lubrication, and use high-quality fluids. Periodic inspection of the fuel, ignition, air intake, and exhaust systems helps catch minor issues before they escalate. Preventive measures reduce the risk of future engine problems, extend the engine’s lifespan, and maintain optimal performance.
Final Words
Properly maintaining your vehicle and addressing engine issues promptly is essential for safety, performance, and longevity. When you notice signs like unusual noises, reduced power, or dashboard warning lights, taking action quickly can prevent more severe damage and costly repairs. By carefully inspecting fuel systems, ignition components, air intake, exhaust systems, and mechanical parts, you can pinpoint the source of the problem.
Following a systematic approach allows you to understand the underlying cause and take the necessary repair steps. Performing routine maintenance, such as replacing spark plugs, cleaning filters, and checking fluid levels, reduces the likelihood of unexpected breakdowns. Regular monitoring of engine performance also ensures that minor issues are addressed before they escalate into major problems.
Learning [How to Identify and Fix Engine] effectively empowers you to maintain your vehicle in top condition. By combining careful observation, preventive care, and timely repairs, you ensure reliable performance, avoid costly downtime, and extend the life of your engine.