How To Remove Yakima Roof Rack: Step-By-Step Guide For Easy Removal
Roof racks provide excellent versatility for carrying extra gear, whether for road trips, outdoor adventures, or hauling bulky items. However, there are times when removing the rack becomes necessary, whether for cleaning, maintenance, or preparing the vehicle for a more streamlined look. Understanding the proper steps ensures that both your vehicle and the rack remain in good condition.
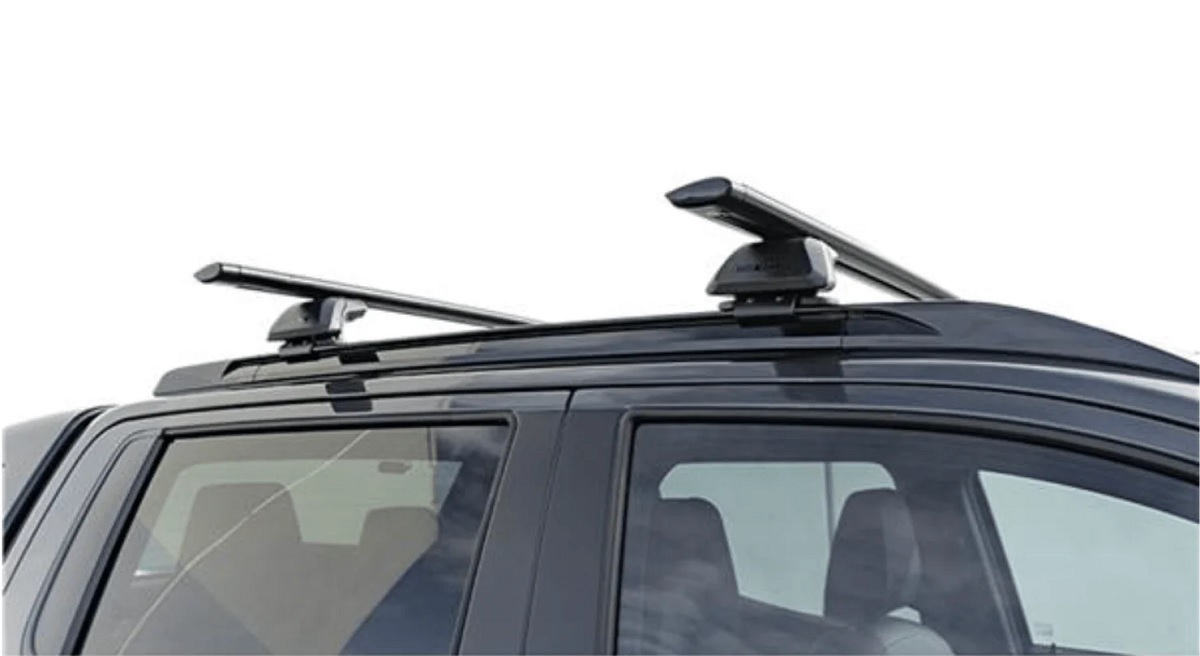
Learning how to remove yakima roof rack involves a combination of simple tools, careful handling, and knowledge of the specific model you own. Different Yakima systems, such as the JetStream, CoreBar, or BaseLine, have slightly different attachment mechanisms, so following the correct procedure prevents damage to the crossbars, mounts, or your vehicle’s roof.
Proper removal also helps preserve the rack’s components for future use. Taking your time, keeping track of all bolts and parts, and following step-by-step instructions ensures the rack can be reinstalled easily when needed.
Tools Needed To Remove Yakima Roof Rack
Removing a Yakima roof rack requires more than just brute force. Having the right tools ensures the process is safe, efficient, and prevents damage to both the rack and your vehicle. Proper preparation can save time and make reinstallation easier, especially when dealing with different Yakima models that have varying attachment mechanisms.
Hex Keys And Allen Wrenches
Hex keys or Allen wrenches are essential tools for removing most Yakima roof racks. Many Yakima crossbars and mounts use hex bolts to secure the rack to the vehicle’s roof rails or mounting points. Using the correct size prevents stripping the bolt heads, which can make removal extremely difficult.
When selecting your hex keys, ensure you have a full set of sizes. Some racks use smaller bolts for clamps or end caps, while main crossbars may require larger hex keys. Working carefully and applying steady pressure reduces the risk of rounding off the bolts.
Hex keys allow you to loosen bolts evenly on both sides of the roof rack, ensuring smooth removal of the crossbars and mounts. Keeping the bolts organized during removal also helps during reinstallation, maintaining proper torque and alignment.
Screwdrivers
Screwdrivers are another common tool needed when removing a Yakima roof rack. Depending on your model, you may encounter Phillips or flathead screws securing components such as end caps, foot packs, or rubber pads. Removing these screws is often the first step before loosening the main mounting bolts.
Using the correct screwdriver prevents damage to the screw heads and surrounding components. Some end caps are tightly fitted, so applying gentle, even pressure helps avoid cracking plastic parts. Magnetized screwdrivers can also be useful for preventing screws from falling onto your roof or driveway during removal.
Screwdrivers are also handy for prying or lifting minor trim pieces around the mounts without scratching the vehicle. Being patient during this process ensures that all components remain intact and ready for future use.
Socket Wrenches And Ratchets
Socket wrenches or ratchets are often required for larger bolts, particularly for heavier Yakima roof rack systems or crossbar assemblies attached to factory roof rails. They provide the leverage needed to loosen bolts that cannot be removed with hex keys or screwdrivers alone.
Having a complete set of metric and standard sockets allows you to handle various bolt sizes. A ratchet with a flexible head can reach tight spaces between the roof rack and the roof, making removal easier and reducing the risk of dropping tools.
Socket wrenches also make it simpler to apply even torque when loosening multiple bolts simultaneously. Using them carefully avoids stripping threads or over-tightening during reinstallation, keeping both the rack and vehicle in good condition.
Rubber Mallet And Prying Tools
A rubber mallet and plastic prying tools can help gently free parts that are stuck or snugly fitted. Some Yakima foot packs or end caps may be secured tightly and require a gentle tap to loosen.
Plastic prying tools are especially useful for separating mounts or pads from the roof without scratching paint. Using metal tools can easily damage the vehicle’s finish, so investing in plastic tools designed for automotive use is recommended.
These tools are also helpful for aligning components during removal, preventing unnecessary bending or stress on crossbars. Controlled, careful use ensures the entire roof rack system can be removed safely and stored for future use.
Safety Gloves And Soft Cloths
Wearing safety gloves protects your hands from sharp edges, bolts, and rough components during removal. Roof racks often have metal parts and hard plastics that can cause cuts or abrasions.
Soft cloths or towels placed between the roof and rack components prevent scratches and dings on the vehicle’s paint. Protecting the vehicle’s finish during removal is critical, especially if the rack is tightly secured or requires prying to loosen.
Keeping gloves and cloths on hand improves grip, reduces fatigue, and ensures the removal process is safer and more controlled. These simple tools make a significant difference in maintaining both the rack and your vehicle’s condition.
Preparing Your Vehicle For Roof Rack Removal
Before removing a Yakima roof rack, preparing your vehicle is essential to ensure the process is smooth and prevents damage. Proper preparation includes cleaning the roof, protecting the paint, and organizing tools and components. Taking these steps reduces the risk of scratches, dents, or lost parts while making removal more efficient.
Clean The Roof And Rack Area
The first step in preparing your vehicle is to thoroughly clean the roof and the area around the roof rack. Dirt, dust, and debris can scratch the paint during removal, especially when lifting or sliding components. Use a soft cloth or sponge with mild soap and water to clean both the rack and the roof surface.
Pay close attention to the foot packs, end caps, and mounting points. Cleaning these areas ensures bolts and screws are free from grime, which can prevent smooth loosening. Removing grit from under pads or mounts also protects your vehicle’s paint from accidental scratches.
A clean surface allows you to see all mounting components clearly and reduces the chance of overlooking any bolts or clamps. It also provides a safer working environment, as slippery surfaces from dirt or moisture are eliminated.
Gather Tools And Organize Components
Before beginning the removal process, gather all necessary tools such as hex keys, screwdrivers, socket wrenches, and plastic prying tools. Having everything on hand prevents delays and reduces the risk of losing small bolts or screws during disassembly.
Organizing components in labeled containers or trays ensures each piece is accounted for. Keeping washers, screws, and end caps together allows for easy reinstallation in the future. Some Yakima models have multiple small components, so tracking them carefully prevents mistakes.
Having a tool layout nearby also helps maintain efficiency. You can quickly switch between tools as needed, and any specialized tools, such as a torque wrench or rubber mallet, are ready when required.
Protect The Vehicle’s Paint
Protecting the vehicle’s paint is a critical step in preparation. Even with careful handling, roof racks can scrape or dent the surface during removal. Placing soft cloths, towels, or foam padding between the rack and the roof reduces direct contact and prevents scratches.
If using prying tools to remove foot packs or end caps, always use plastic or rubber tools instead of metal ones. Plastic tools minimize the risk of damaging the paint or trim around the mounting points.
Additionally, consider taping sensitive areas near the roof rails with painter’s tape to provide extra protection. Proper paint protection allows you to handle the roof rack more confidently and reduces the need for costly paint repairs later.
Ensure Vehicle Stability And Safety
Before starting the removal, ensure the vehicle is parked on a flat, stable surface. Engage the parking brake and, if possible, use wheel chocks to prevent movement. Working on a vehicle that is not stable increases the risk of accidents or dropping the rack.
It is also helpful to have a step ladder or stable platform for easier access to the roof. This allows you to reach bolts and mounts comfortably without overextending or risking a fall. Maintaining good balance and posture ensures safer and more controlled handling of the roof rack.
By preparing your vehicle properly, you minimize risks and make the removal process more efficient. Cleaning, organizing tools, protecting the paint, and ensuring stability are all essential steps before loosening bolts and removing the Yakima roof rack.
Removing Crossbars From Yakima Roof Rack
Removing the crossbars from a Yakima roof rack is an essential step when taking down the system for storage, maintenance, or vehicle clearance. Crossbars provide the main support for your gear, and proper removal ensures you avoid damaging the bars, mounts, or your vehicle’s roof. Understanding the correct steps and tools makes the process safer and more efficient.
Loosen End Caps And Mounting Bolts
The first step in removing crossbars is to loosen the end caps and mounting bolts that secure them to the foot packs or towers. Most Yakima crossbars are held in place with hex bolts or screws, which require a hex key or screwdriver for removal. Carefully unscrew each bolt while keeping one hand on the crossbar to prevent it from slipping.
End caps often cover these bolts, so gently pry them off using a plastic prying tool or flathead screwdriver. Take care not to damage the plastic caps, as they protect the crossbar ends and maintain a clean finish. Removing these components first allows you to access the main attachment points and ensures a smooth disassembly.
Keeping bolts, washers, and end caps organized in a container or labeled bag prevents losing small parts, which is important for future reinstallation. This step also ensures the crossbars can be reattached correctly without misalignment.
Slide Crossbars Out Of Foot Packs
Once the mounting bolts and end caps are removed, the crossbars can usually be slid out of the foot packs or towers. Depending on your Yakima model, the crossbars may have a locking mechanism or tabs that need to be released before sliding them free.
Gently lift the crossbar slightly and slide it toward one side to disengage it from the mount. Avoid forcing the bar, as excessive pressure can damage the crossbar, mounting hardware, or roof rails. If the crossbar feels stuck, inspect the mounting points to ensure no screws, clamps, or locks are still engaged.
Sliding the crossbars out carefully also reduces the risk of scratching the roof. Holding the bar at both ends and maintaining control during removal prevents accidental impacts with the vehicle or surrounding objects.
Inspect Crossbars And Mounts For Wear
After removing the crossbars, inspect them and the foot packs for signs of wear or damage. Look for cracks, dents, or stripped threads that could compromise future performance. Also, check the rubber pads and mounting hardware for wear, as these parts maintain a secure grip on the roof and protect the paint.
Replacing worn components before reinstalling the crossbars ensures safety and prevents damage to your vehicle or cargo. Cleaning the bars and mounts during this stage also prolongs the life of the roof rack, keeping it in optimal condition for future trips.
Maintaining crossbars and mounts helps avoid issues such as rattling, uneven weight distribution, or reduced load capacity. Regular inspection ensures the system continues to function properly after reinstallation.
Store Crossbars Safely
Once removed, store the crossbars in a safe, dry location to prevent warping, bending, or scratching. Use padding or wrap them in soft cloths to protect the finish and maintain their structural integrity.
Keeping all hardware organized alongside the crossbars ensures easy reassembly. Proper storage helps preserve the roof rack’s lifespan and makes future installations faster and more efficient. Storing crossbars carefully also prevents accidental damage that could compromise their load-bearing ability.
Dealing With Locked Yakima Roof Racks
Yakima roof racks often feature locking mechanisms to secure your gear and prevent theft. While these locks provide valuable security, they can also create challenges when it’s time to remove or adjust the rack. Understanding how to handle locked Yakima roof racks safely and efficiently ensures you avoid damaging the lock, the rack, or your vehicle during removal or maintenance.
Locating And Understanding The Lock Mechanism
The first step in dealing with a locked Yakima roof rack is identifying the type of lock installed. Most Yakima crossbars and foot packs feature integrated cylinder locks or key locks, which prevent the crossbars or towers from being removed without the correct key.
Different models may have varying lock placements. Some locks are located directly on the foot pack, while others are hidden under end caps or protective covers. Carefully inspecting your rack and consulting the user manual helps you understand how the locking system operates and which components it secures.
Understanding the mechanism prevents unnecessary force during removal. Applying pressure to the wrong part can strip the lock cylinder, damage mounting hardware, or scratch your vehicle. Knowing the lock type also helps determine whether additional tools or precautions are required for removal.
Using The Correct Key And Lubrication
Using the correct Yakima key is critical for safely unlocking the roof rack. Insert the key gently and avoid forcing it, as excessive pressure can bend the cylinder or break the key. Turn the key slowly to disengage the lock while ensuring the lock components align properly.
In some cases, locks may feel stiff due to dirt, debris, or lack of lubrication. Applying a small amount of graphite-based lubricant or a silicone spray can improve movement without causing corrosion or attracting dust. Avoid using oil-based lubricants, as these can gum up the lock over time.
Regular maintenance of the lock, including cleaning and lubricating, ensures smooth operation. Proper handling of the key and lock reduces the risk of jamming or damage during removal, allowing the crossbars or foot packs to be safely detached.
Handling A Jammed Or Stuck Lock
If the lock does not turn easily, avoid forcing it, as this can break the key or damage the lock cylinder. First, ensure the key is fully inserted and correctly oriented. Slight wiggling while applying gentle pressure may help disengage the mechanism.
Using a lock lubricant can often free a jammed lock. Spray a small amount directly into the keyway, allow it to penetrate, and then try turning the key again. For locks that remain stuck, contacting Yakima customer support or a professional locksmith ensures proper handling without causing permanent damage.
Preventing excessive force and being patient with stuck locks is crucial. Forcing a jammed lock can damage the foot pack, crossbars, or even your vehicle’s roof surface, creating expensive repairs that could have been avoided with careful handling.
Removing Locked Crossbars Or Foot Packs
Once the lock is disengaged, you can safely remove the crossbars or foot packs. Loosen the mounting bolts and slide the crossbars out, taking care to support the weight to avoid scratching the roof. If the foot packs remain attached, gently lift or slide them off the roof rails after unlocking.
Always store the key in a secure, easy-to-reach location for future use. Keeping a spare key on hand helps prevent being locked out of your roof rack during maintenance or when transporting gear.
Maintaining awareness of the lock’s position and handling it carefully during removal preserves both the security function and the structural integrity of your Yakima roof rack. Properly disengaged locks make reinstallation straightforward and reliable.
Maintaining Yakima Locks For Longevity
Regular maintenance of Yakima roof rack locks prevents future issues. Clean the lock cylinder with a soft brush to remove debris, and lubricate with graphite powder or a silicone-based spray. Avoid water exposure when possible, as moisture can lead to corrosion inside the lock.
Periodic checks ensure the key turns smoothly, and inspecting for worn or damaged parts helps prevent failure. Taking these steps keeps your roof rack secure while making future adjustments or removals much easier.
Properly maintained locks preserve both security and convenience, allowing you to safely remove and reinstall the roof rack as needed. Routine care extends the lifespan of your Yakima system and protects your vehicle from damage.
Cleaning And Maintaining Your Roof After Removal
After removing a Yakima roof rack, it’s important to properly clean and maintain your vehicle’s roof. The areas previously covered by mounts and crossbars can accumulate dirt, grime, and moisture, which may damage paint or trim if neglected. Regular cleaning and maintenance not only protects your vehicle but also prepares the roof for future rack installation or other accessories.
Cleaning Residue And Dirt
Once the roof rack is removed, the first step is to clean any residue or dirt left behind. Dust, pollen, and road grime often accumulate around the foot packs, rails, and mounting points. Use a mild car wash soap and a soft sponge or microfiber cloth to gently scrub these areas.
Pay attention to any crevices or rubber pads where dirt may be trapped. These areas can hold moisture and cause paint damage or corrosion over time. Avoid using abrasive brushes or harsh chemicals, as these can scratch the vehicle’s finish or degrade any protective coatings.
Thorough cleaning ensures the roof remains smooth and free from contaminants. Removing all residue also makes it easier to inspect the surface for scratches, dents, or other signs of wear caused by the roof rack.
Inspecting The Roof Surface
After cleaning, inspect the roof for any scratches, scuffs, or minor dents. Roof racks can leave marks on paint, especially if the mounts shifted during use or installation. Carefully check around mounting points and along the rails where the rack rested.
Minor scratches can be treated with touch-up paint or a scratch remover, while deeper marks may require professional attention. Checking for paint chips or rust spots ensures these areas are addressed before they worsen, maintaining the integrity of the roof surface.
Regular inspections prevent small issues from turning into larger problems, keeping your vehicle in optimal condition and ready for future rack installations or other rooftop accessories.
Protecting The Roof With Wax Or Sealant
Applying a protective wax or paint sealant helps maintain your roof after removing the rack. Wax provides a barrier against UV rays, moisture, and dirt, reducing the risk of fading, oxidation, or corrosion in areas previously covered by the rack.
Choose a high-quality car wax or synthetic sealant compatible with your vehicle’s paint type. Apply it evenly across the roof using a microfiber applicator pad, then buff to a smooth finish. Focus on areas around the previous mounting points and along roof edges to provide extra protection.
Regular application of wax or sealant not only preserves the paint but also makes future cleaning easier. It ensures the roof remains in excellent condition, whether you reinstall a roof rack or leave it bare.
Maintaining Rubber Pads And Roof Rails
If your vehicle has factory roof rails or rubber trim where the rack was mounted, inspect and maintain these components. Clean rubber pads with a mild soap solution and apply a rubber conditioner to prevent drying, cracking, or fading.
For metal rails, remove any debris and apply a protective coating or light lubricant if recommended by the manufacturer. Keeping these parts in good condition ensures proper adhesion for future mounts and prevents damage to the vehicle’s finish.
Maintaining both the paint and mounting components prolongs the lifespan of your roof system. Regular care ensures that the roof remains functional, attractive, and ready for the next adventure.
Storage And Care For Removed Components
Finally, clean and store the roof rack components properly. Wash crossbars, foot packs, and end caps to remove dirt or road salt, then dry completely before storing. Wrap them in soft cloths or store in protective bags to prevent scratches and corrosion.
Keeping all bolts, washers, and keys organized alongside the components ensures easy reassembly in the future. Proper storage preserves both the roof rack and your vehicle, making future installations smooth and hassle-free.
People Also Asked
How Do You Remove The Crossbars From A Yakima Roof Rack?
To remove the crossbars, start by loosening the clamps or bolts that secure them to the towers. Use the proper Allen wrench or tool included with your Yakima kit. You may need to lift the rubber pads slightly to access the screws underneath.
Once the clamps are loose, carefully slide the crossbars off the towers. Avoid forcing them, as this can scratch your vehicle’s roof. Keep the hardware in a safe place for future use. Cleaning the crossbars before storage can prevent dirt buildup and damage.
How Can You Remove Yakima Foot Packs Safely?
Begin by checking the mounting points where the foot packs attach to your roof rails or factory mounts. Use the correct wrench or Allen key to loosen each bolt. Removing the foot packs can sometimes be tricky if the mounts are tight, so proceed slowly.
After loosening the hardware, gently lift the foot packs off the roof. Make sure not to scratch the vehicle’s paint. Store the foot packs in a clean, dry area with their hardware to avoid losing any small pieces.
What Should You Do If The Yakima Roof Rack Is Locked?
If your Yakima roof rack has locks, you will need the key to unlock it before removal. Insert the key into the lock cylinder and turn it fully to disengage the locking mechanism.
If the key doesn’t work or the lock is stuck, applying a small amount of lubricant can help free it. Avoid forcing the lock, as this can damage both the lock and the roof rack components. Once unlocked, you can proceed with removing crossbars and foot packs safely.
Can You Remove A Yakima Roof Rack Without Tools?
Most Yakima roof racks require basic tools like an Allen wrench or screwdriver for removal. Some newer models may have tool-free adjustments, but fully detaching the rack usually needs at least one tool to loosen the clamps or bolts.
Attempting to remove the rack without tools can damage the hardware or your roof. Using the proper tools ensures you can remove it efficiently while keeping the rack and your vehicle in good condition for future use.
How Do You Prevent Scratches While Removing Yakima Roof Racks?
To avoid scratches, first place soft cloths or towels on the roof surface near the rack. Handle all components gently, especially crossbars and foot packs, during removal. Avoid dragging any part across the paint.
Loosen all bolts or clamps before attempting to lift pieces off. Take your time, and ensure the rack is supported while removing it. After removal, inspect the roof and clean any dirt or debris to prevent long-term marks or scratches.
What Is The Best Way To Store Yakima Roof Rack After Removal?
Store your Yakima roof rack in a clean, dry area to prevent rust and damage. Keep all crossbars, foot packs, and hardware together in a labeled container or bag to avoid losing small parts.
If possible, store crossbars flat or hanging to prevent warping. Make sure the roof rack components are dry before storage. Periodically check for dust or moisture buildup to maintain them in good condition for your next installation.
How Do You Deal With Rust Or Stains After Roof Rack Removal?
After removing your Yakima roof rack, inspect the roof surface for any rust spots, scratches, or stains. Clean the area using a gentle car-safe cleaner to remove dirt or residue.
If rust is present, treat it with a small amount of rust remover and touch up the paint if needed. Applying a protective wax coat over the mounting area can prevent future rust and maintain your vehicle’s finish. This step ensures your roof stays clean and damage-free for future rack installations.
Conclusion
Removing a Yakima roof rack may seem challenging at first, but following the right steps and using the proper tools makes the process straightforward and safe. Taking the time to prepare your vehicle, gather tools, and protect your roof ensures that both the vehicle and the rack remain in good condition throughout removal.
Understanding how to remove yakima roof rack involves loosening end caps, bolts, and carefully sliding the crossbars and foot packs off the roof. Paying attention to locked mechanisms and maintaining organization of all hardware prevents damage and simplifies future reinstallation. Proper handling reduces scratches, protects mounts, and ensures that components remain functional for future use.
Additionally, cleaning and inspecting the roof after removal maintains the paint and prevents corrosion or damage to mounting points. Following these steps guarantees that the vehicle is ready for storage, maintenance, or reinstallation. Learning the correct procedure for how to remove yakima roof rack ultimately makes the task efficient, safe, and stress-free.